

So with staking rewards expected to go live on eCash in the not too distant future, I thought I’d write this article to teach people how to create their own Avalanche proof, which is necessary if you want to earn staking rewards. Details such as the amount of staking rewards, or an official launch date have yet to be announced, but I expect some big news in the coming days.
It stands to reason that those who will benefit the most from staking rewards will be those who have their staking nodes set up from the start. This is due to a couple of reasons. One, because there will be less competition in the beginning, and two, because the halving is coming so whatever the rewards are will be significantly reduced after April of next year.
In order to get your staking node ready, here’s what you will need. A minimum of 100M XEC as a single UTXO. You will also need to download the Electrum ABC wallet, which means you will need a computer. Unfortunately, it is not currently possible to run a staking node using only your phone. It is also recommended to have an offline computer that you can use during this process so you never expose your cold storage coins to the internet. However, if you aren’t using a hardware wallet anyway, then it doesn’t matter. Just beware that storing eCash on a hot wallet comes with its own unique set of risks.
Before we continue, I want to state most of the information found in this article comes right out of the Bitccoin ABC blog post that can be found here. If you’re more technical and want to understand how the eCash Avalanche protocol works, please go read the original post this is based on. This article is focused only on providing step by step instructions on how to create an Avalanche proof that you can use while running your own node. I’ve taken the liberty of making some changes so that it might be easier to follow for those who are less technically inclined like myself.
Please note these instructions are specifically geared towards those who are using a hardware wallet and want to ensure their private keys never touch the internet. If you are someone who holds your eCash on a hot wallet, you can do this all on a single machine connected to the internet. Just please be careful and stay away from malicious sites and suspicious links.
Generating a Proof using Electrum ABC
First you will need to download and install Electrum ABC on your machine as well as on a flash drive. If you’re using a Macbook, you will also need to go into your settings under privacy and security and give permission for the program to be installed.
Once installed, create a new wallet and proceed to step 1.
Step 1: Create the Skeleton Proof
This step is done on a regular computer connected to the internet. This will create a wallet that can be used to manage your Proofs, and create Delegations if you decide to do that later. Simply follow these steps:
- Create a new wallet. This will be your “Proof wallet”.
- Open Tools > Avalanche Proof Editor.
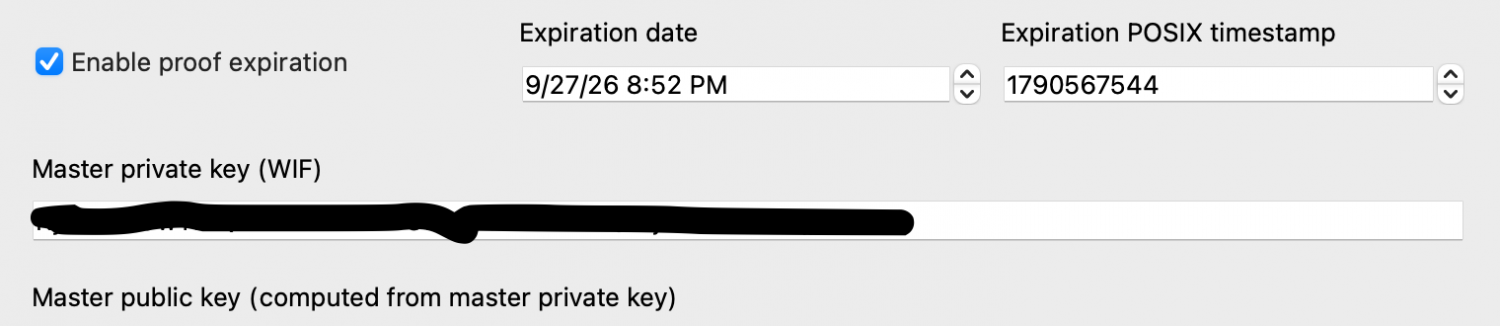
- Review the fields and adjust them if desired. For example, you may want to change the Payout Address (note the payout address for later) to one in another wallet, or adjust the expiration time.
- Click Generate proof.
- Save the proof (a) onto a flash drive.
Step 2: Add Stakes to the Proof
Online portion:
- Open a watch-only version of your coin-holding wallet. For example, this could be your regular Trezor wallet connected using Electrum ABC.
- Open the ‘Coins’ tab, select the coins you want to stake, right click and click ‘Export coin details’ to export the coins file. Make sure the coins you select meet the requirements for Staking: each coin must be at least 100,000,000.00 XEC and have at least 2016 confirmations. Save this file onto the flash drive as well.
For the next steps, move to an offline computer. You should have also downloaded onto the flash drive the latest version of Electrum ABC. Using the memory stick, install Electrum ABC onto your offline computer. Once installed, recreate your cold storage wallet by entering your seed phrase. (Remember, this is only okay because you are working on a computer that isn’t connected to the internet. You should never type in your seed phrase on a computer that is online.)
Once you have recreated the coin-holding wallet on your offline computer, follow these steps to add your coins as Stakes in the Proof.
- In the Proof editor, click on the “Load proof” button, then click on “Load from file” and select the file you saved earlier (a).
- Click OK on warning. It’s OK that this wallet doesn’t have the Proof Master Key. It just means you won’t be able to sign the final Proof at the end from this wallet. (You may not see this warning message if you aren’t using an offline computer.)
- After you click OK on the warning you will see the information on the screen change. Notably the payout address will now show up as the address from the earlier online portion.
- Next add coins from the Coin Details file you saved previously. You will now see the total amount of your coins as well as the tx id and the block height in which it was last mined.
- Click Generate proof.
- Click Save Proof, Click OK on warning. You will see that the master signature is invalid, but all you need to do is click save proof and save it to your memory stick again.
- After the Proof has been saved, you can delete the wallet and/or wipe the entire offline computer.
Step 3: Sign the Proof with Proof Master Key
- Back on your online computer, open your Avalanche Proof wallet again and open the Avalanche Proof Editor under Tools.
- Click on Load Proof and load the unsigned Proof that was saved from the offline computer. You will see new data appear in the fields including a green checkmark showing your master signature is valid.
- Click on Generate Proof. This will actually sign the entire Proof with the Proof Master Key.
- Save the signed Proof (b).
Now you have an Avalanche Proof, and can run an eCash Avalanche node!
How to run an Avalanche enabled eCash Node
To run Avalanche, you must first run an eCash node. To do so, you have two options. You can either run an eCash node using a VPS (instructions here), or on your home machine by downloading the latest release here. Again, if you are using a Macbook, you will need to go to privacy and security under settings to permit the client to be installed.
Keep in mind that running on your home machine will require leaving your computer on all day if you want to have good uptime. Using a VPS can increase your node’s reliability score but you will have to pay a provider.
Once you’ve got your node set up, restart your node with the following parameters added to your bitcoin.conf file:
avalanche=1
debug=avalanche
# Proof dependent parameters
avaproof=<your hex Proof>
avamasterkey=<your Master Private Key, WIF format>
Replace <your hex Proof> with the proof (b) you just generated. It’s the one that starts with a long string of zeros.
Then replace <your Master Private Key, WIF format> with the Master Private Key (WIF) From your Avalanche Proof Editor:
Once you’re finished, you can check to see if your node is working by running getavalancheinfo. You should see something like this:
“ready_to_poll”: true,
“local”: {
“verified”: true,
“sharing”: true,
When you first start your node, it may show up as false or pending. Pending means the node is waiting for a block to trigger the verification. Once a block is found and your verification flips to true, you will be running an Avalanche enabled eCash node. You should eventually see your stake appear on Avalanche.cash as well as ecash.coin.dance/avalanche.
What if it never verifies? This may be happening if you are running your node on your home machine and you don’t have port forwarding enabled. Previously, to enable port forwarding you had to change a bunch of settings on your wifi router, but starting with Bitcoin ABC 0.26.3, they added something called NAT-PMP for easy port forwarding. All you need to do is open your Bitcoin.conf file and add natpmp=1 as shown below:
avalanche=1
debug=avalanche
# Proof dependent parameters
avaproof=<your hex Proof>
avamasterkey=<your Master Private Key, WIF format>
natpmp=1
Then restart your node and you should now see inbound peers. The next time a block is found, your verification should flip to true.
One last thing…
Avalanche protocol relies on the node being well connected to the rest of the network. I like to check my node from time to time to see that everything is running properly. You can also run getavalanchepeerinfo to see what your availability score is compared to other peers. The more uptime your node has, I assume the higher your chances of winning staking rewards. If for whatever reason your node is no longer connected, I’ve found updating to the latest Bitcoin ABC release tends to help.
Good luck, and I hope you’re able to use this to try and run your own Avalanche enabled eCash node.
FAQs
What’s the purpose of running your own node?
Those who run their own node will be helping the eCash network by adding security through increased sybil resistance. This is because honest stakers will help prevent 51% attacks and double spends. Running your own node will also help improve the overall user experience by enabling instant finality and other new features.
If I run a node, what benefits will I get?
Once staking rewards go live, running your own Avalanche enabled eCash node will qualify you for staking rewards. I also anticipate that in the future, staking nodes will play an important role in helping the eCash network achieve consensus as participants will get the opportunity to vote on policy changes and proposals.
More Resources:
YouTube video on how to set up your own VPS node
YouTube video on how to create your own stake proof for your node